OEA Ultimate Food Safety Guidelines
Safer kitchens by design. A practical guide to food safety for operators, designers, and foodservice professionals.
Food safety isn’t just a training issue — it’s a design issue.
The layout of a receiving dock, the placement of a handwash sink, the capacity of your walk-in cooler, and the visibility of your thermometer logs all shape whether safe practices happen consistently or fall apart under pressure.
Drawing on real-world HACCP (Hazard Analysis and Critical Control Point) documentation used in large-scale institutional dining, here’s a practical, design-minded walkthrough of the food safety fundamentals every culinary space should be built around.
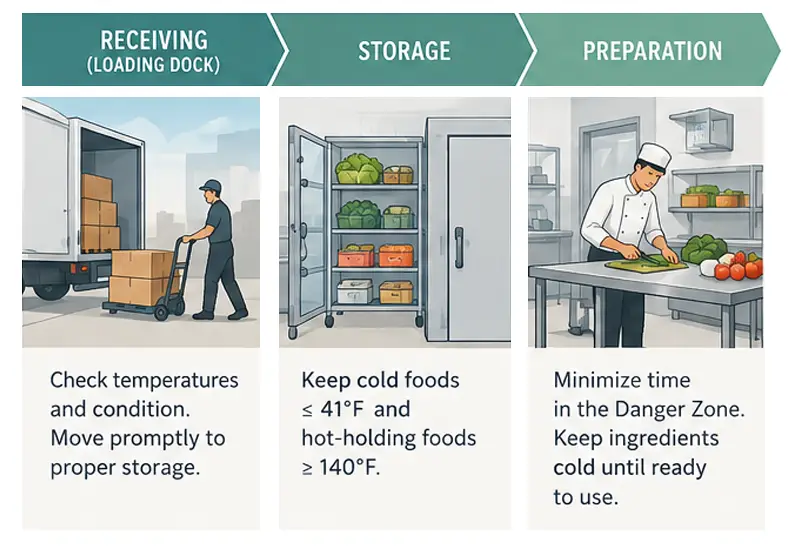
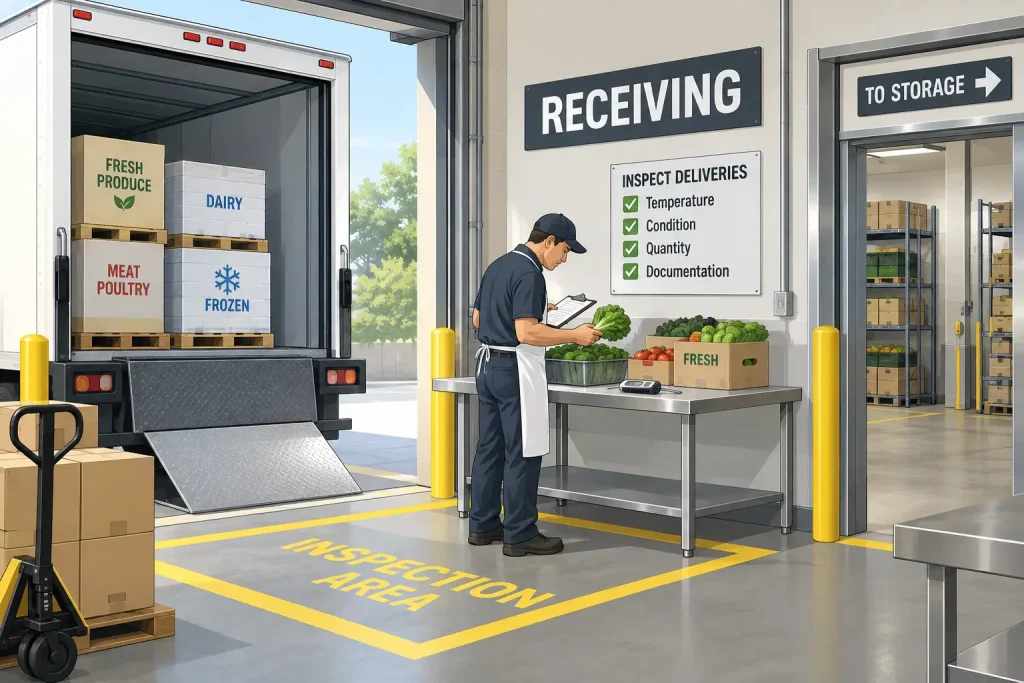
1. Purchasing & Receiving: Safety Starts Before Food Enters the Building
The most overlooked food safety control point is the one that happens before a single pan hits the stove. A well-run receiving area sets the tone for everything downstream.
Design and operational tips
- Locate receiving docks away from trash and chemical storage to prevent cross-contact.
- Build in space for a quick visual and temperature check before product moves into storage — a small prep counter or shelf near the door works well.
- Keep delivery vehicles and staff accountable with a receiving log that tracks vehicle condition, packaging integrity, and spot-checked temperatures on potentially hazardous foods (PHFs).
- Set hard rejection criteria: refrigerated foods above 40°F, shell eggs and shellfish above 45°F, or any frozen product showing signs of thawing should be turned away at the door.
Reliable receiving protocols catch problems when they’re still someone else’s liability, not yours.
2. Storage: Let the Room Do the Organizing
Storage failures are rarely about bad intentions; they’re about kitchens where the “right” way to store something is harder than the wrong way. Good storage design removes that friction.
Design and operational tips
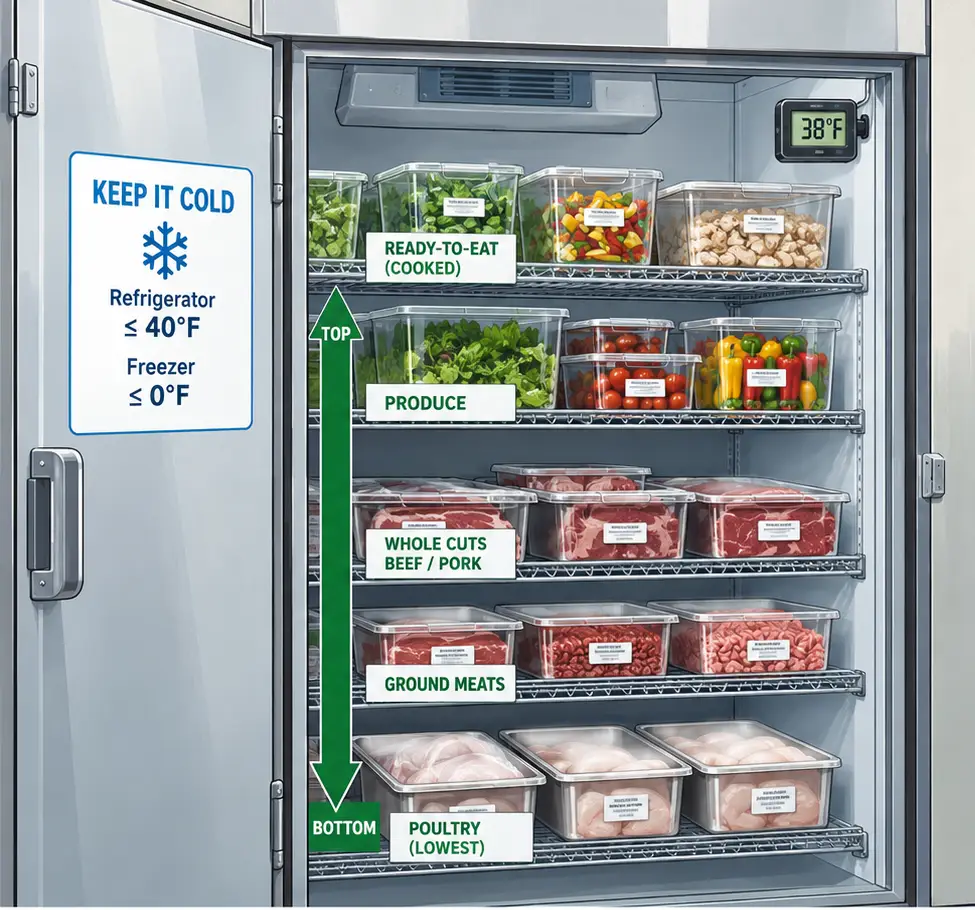
- Maintain refrigeration at 40°F or below and freezers at 0°F or below, and mount thermometers where they’re easy to read without opening the door.
- Use shelving hierarchy: ready-to-eat and cooked items above, raw proteins below, sequenced by required cook temperature (poultry lowest, whole cuts of beef/pork above it).
- Store chemicals in a dedicated, separate area — never near food, and never on shelving above food product.
- Build FIFO (first in, first out) into the room itself: sloped shelving, clear labeling zones, and date-coded bins make rotation intuitive rather than optional.
A well-organized walk-in doesn’t just look clean — it’s a working safety control.
3. Handwashing & Hygiene Stations: Make the Right Move the Easy Move
Handwashing compliance drops sharply when a sink is inconveniently placed or awkward to use mid-task. This is one of the clearest cases where kitchen design directly drives food safety outcomes.
Design and operational tips
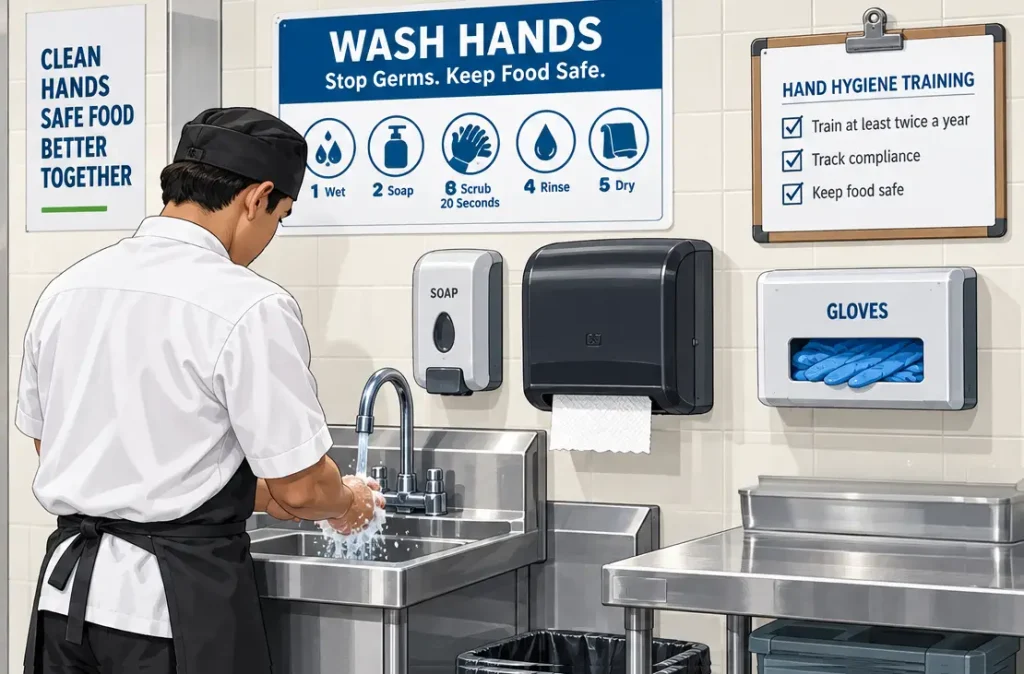
- Place dedicated handwash sinks within a few steps of every prep station — not just at the entrance to the kitchen.
Stock sinks with soap, disposable towels, and a visible reminder sign at eye level.
- Pair handwashing stations with glove dispensers positioned at the task, not across the room, to reduce “glove drift” (workers skipping changes because the box is too far away).
- Schedule and document hand hygiene training at least twice a year, and track compliance with a simple observation log.
Reliable receiving protocols catch problems when they’re still someone else’s liability, not yours.
4. Preparation & Cross-Contamination Control
Cross-contamination is a layout problem as much as a habits problem. Where raw and ready-to-eat foods physically cross paths in a kitchen is where risk concentrates.
Design and operational tips
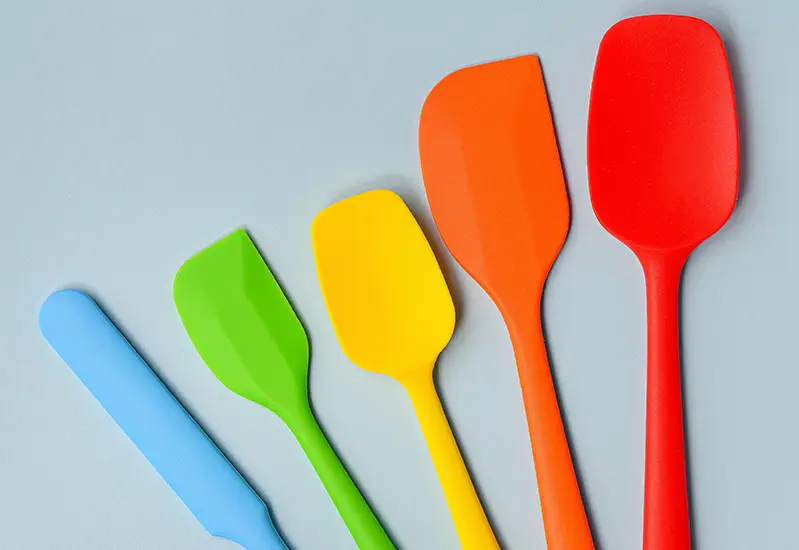
- Use color-coded cutting boards and utensils, and store them in a way that makes the color-coding visually obvious from across the room.
- Separate raw protein prep stations from cold prep / salad stations with distance or physical barriers where possible.
- Build in a wash-rinse-sanitize station (three-compartment sink or dish machine) close enough to prep areas that cleaning between tasks doesn’t become a bottleneck.
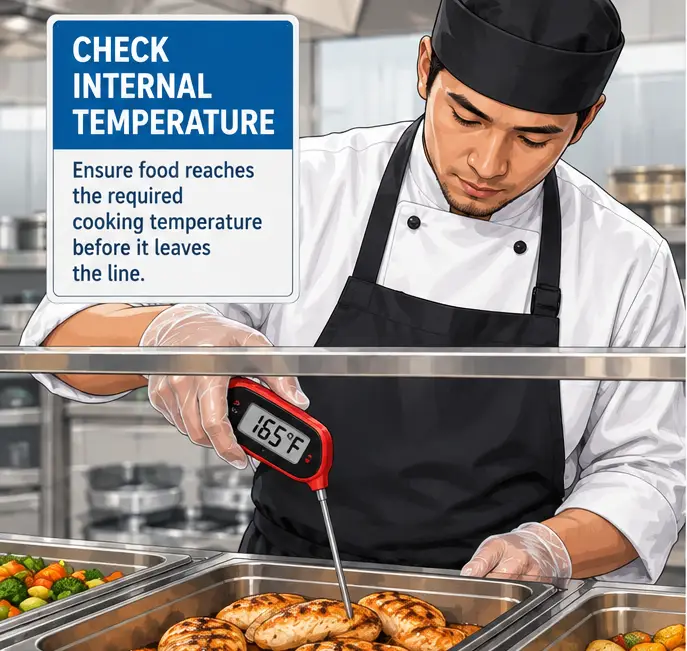
- Post minimum internal cooking temperatures at the line — poultry to 165°F, ground meats to 155°F, whole muscle cuts to 145°F — so the target is visible, not just remembered.
5. Cooking, Cooling & Reheating:
Racing the Clock
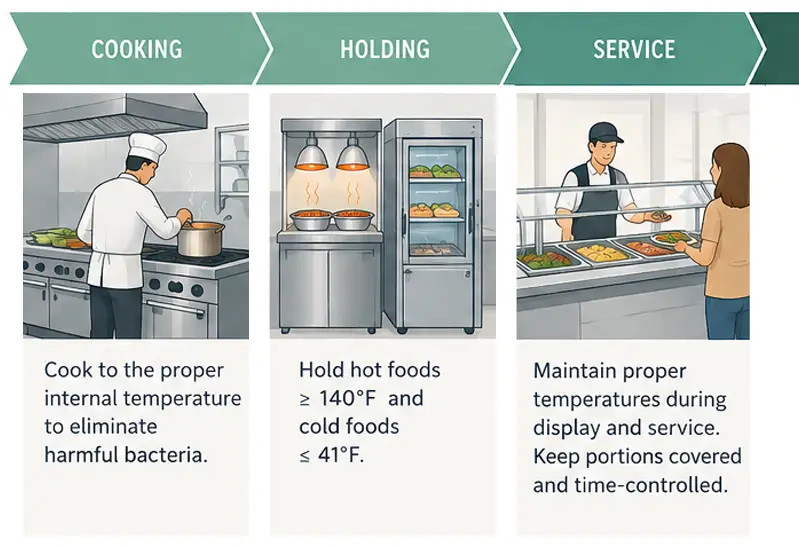
This is where the Temperature Danger Zone does the most damage if timing slips. The numbers matter, but so does whether your equipment can actually hit them.
Key Benchmarks
- Cooking: food must reach its required internal temperature and hold it for the specified time (e.g., 165°F for 15 seconds for poultry).
- Cooling: food must drop from 140°F to 70°F within 2 hours, then to 41°F within an additional 4 hours (6 hours total). If it doesn’t make that window, it must be discarded — no exceptions.
- Reheating: leftovers must climb to 165°F within 2 hours.
6. Hot & Cold Holding
Once food is ready to serve, the danger zone clock starts again the moment holding equipment fails to keep up.
Design and operational tips
- Hot holding: maintain 140°F or above.
- Cold holding: maintain 40°F or below.
- Check and log temperatures at two-hour intervals during service — more often if something feels off.
- If hot food dips below 120°F or cold food climbs above 45°F for more than two hours, it must be discarded.